


5 Ways To Remove a Fake Tan!
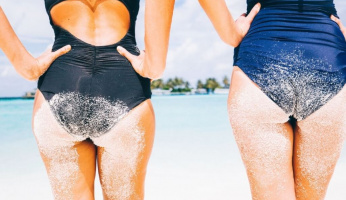
There’s nothing quite like the feeling of returning from a vacation with a golden-brown tint to your skin. Nothing boosts up our confidence like a tan. But we shouldn’t have to wait for Summer to roll around to get our tan on. We’re at our palest and pastiest in the Winter months since we spend the least time outside.
Instead of moping around looking at our ashy, colorless skin wishing we were tanning on a beach in Australia, we could be giving ourselves an at-home tan that will tie us over until then!
There are tons of fake tans out there (some better than others), and everyone has their preferred shade, consistency, and application process. Fake tan is a personal vanity choice in which everyone has their preferences. The one universal thing about a fake tan is that it’s extremely frustrating to get off!
If you’ve ever applied self-tanners or spray tans, you know the struggle and just how bad and streaky it becomes if not removed properly. If you don’t clear your skin of the pigments before your next application, it’ll accumulate on the surface of your skin and leave you patchy, orange, and wishing you could go back to the days of paleness.
There are countless ways to remove self-tan, but not all of them are successful. To help you avoid frustration, we’ve compiled our most effective ways of removing fake tan.
We’ve got 5 awesome DIY tips to help you get all your fake tan off, even in the hard-to-reach places!
1. Exfoliate
Using an exfoliating agent in the shower will help you remove dead skin cells from the surface of your skin that is latching on to the fake tan. It will help to scrub off the pigment on top of leaving your skin baby smooth.
We suggest using a fake tan exfoliating glove designed to help scratch away at the pigments left on your skin for this process. The Existing Beauty Self Tanner Remover & Skin Exfoliating Glove is an exfoliating mitt made to remove old tanning mousses and lotions like a pro.
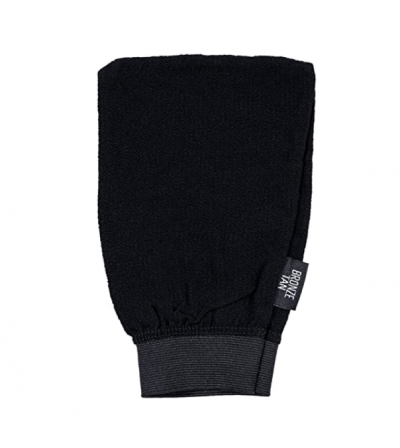
Remember that with exfoliation often comes dryness and irritation. If you’re using exfoliation as a tactic to remove your self-tanner, always follow up with a hydrating lotion afterward.
You want to scrub, but you don’t want to leave your skin raw so pair your exfoliating mitt with a creamy body wash or nourishing body cream to help soothe the skin in the process.
2. Fake Tan Remover
Fake tan remover is a popular choice, especially to undo any tanning mistakes. Most people forget to wash their hands after applying their self-tanner, leaving them with orange skin and ruined nails.
Most fake tan removers don’t have great reviews and don’t do the best job at completing removing the pigments. However, each brand comes with a specific set of instructions on the back, so these fake tan removers are supposed to be effective if used properly!
The most important part of fake tan remover is following the directions. Apply a generous amount and wait for the whole duration mentioned in the instructions.
Our favorite fake tan remover is the St. Tropez Prep & Maintain Tan Remover Mousse. They suggest using this with a mitt to help in the hard-to-reach or stubborn areas. Simple pump to the foam and apply generously over dry, clean skin.
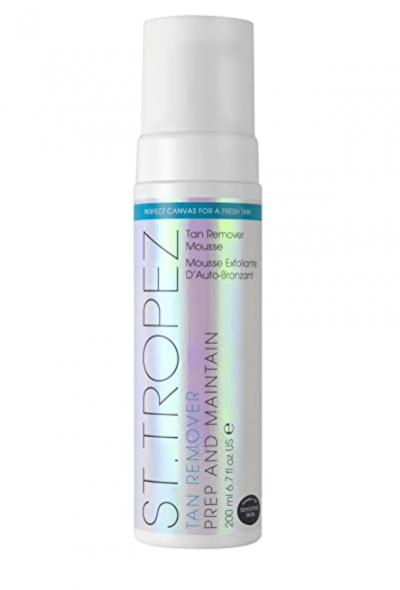
Massage the foam or apply it with a mitt and leave it on for five minutes. Afterward, rinse off in the shower with warm water and buff out any leftover areas.
3. Lemon Juice or Apple Cider Vinegar
Acids like Lemon Juice and Apple Cider Vinegar can help to break down pigments and brighten the skin. They have bleaching properties that can strip the skin of pigments. It can also help reduce the appearance of dark spots.
When using this technique, make sure to dilute the acid of your choice in water. You can also use one of these acids in a base for a body scrub along with some sugar and an oil of your choice for hydration and scrub away.
This method comes with some drawbacks. Acid is light-sensitive, meaning it can increase the photosensitivity of your skin. If you use this method, you should limit your sun exposure or make sure to use a high SPF and a good quality one that protects against any and all harsh UVA and UVB rays.
Acids are also typically drying to the skin, so if you use this method, follow up with coconut oil, baby oil, or any deeply hydrating body butters.
4. Oil
Oils are very useful in cosmetics and beauty. Many people swear by oils for hair growth, eyelash growth, skincare, bath oils and more. It’s also a great gentle way of removing makeup, including the waterproof kind. But did you know that oil can also help you remove fake tan?
There are a few ways you can use oil to help remove your fake tan. The first way is to take a bath. Fill the bathtub with warm to hot water. The steam and hot water will help open the pores to get the pigment out effectively. Add some baby oil or coconut oil to your bath and soak in the water. Make sure to submerge your body or any areas with the fake tan.
After soaking for a while, take your trusted exfoliating mitt and give yourself a nice scrub down. This should effectively remove the pigments from even deep within your pores.
Another way is to slather the area with the oil of your choice for about 40 minutes before taking a shower. Let your body absorb the oil fully.
Then, once you hop in the shower, exfoliate with whatever you have on hand, and the pigment should wash away much easier. It will not only remove the fake tan, but it will prevent your skin from irritation and dryness.
5. Baking Soda
Baking soda is not just a kitchen essential, but apparently, it’s a great trick for removing fake tan. Mixing equal parts baking soda and water will create a paste.
This paste will help chemically break down the pigments but also provide some form of exfoliation to remove any dead skin cells that are carrying the fake tan.
Massage it onto your skin, and make sure to wash it off after a few minutes. Baking soda can damage your skin, so don’t leave it on for more than five to seven minutes at a time. Always do a patch test to ensure that you don’t have an allergy to the mixture.
For a more hydrating experience, swap out the water for oil and create a paste with the baking soda that way. Use the same method with this paste. It will work the same way; the only difference is that it will help to reduce the risk of skin irritation and leave behind silky smooth skin.